

How nice has this recent weather been?! Compared to last Easter this one is a cracker, and if Instagram is anything to go by then the nation (well, interiors fans) have been prepping their gardens and getting them looking stylish for a summer of hanging out with friends and family.
What I have seen a trend for is for making your own garden furniture, with several popular accounts showcasing their gorgeous homemade stuff, including the use of pallets.
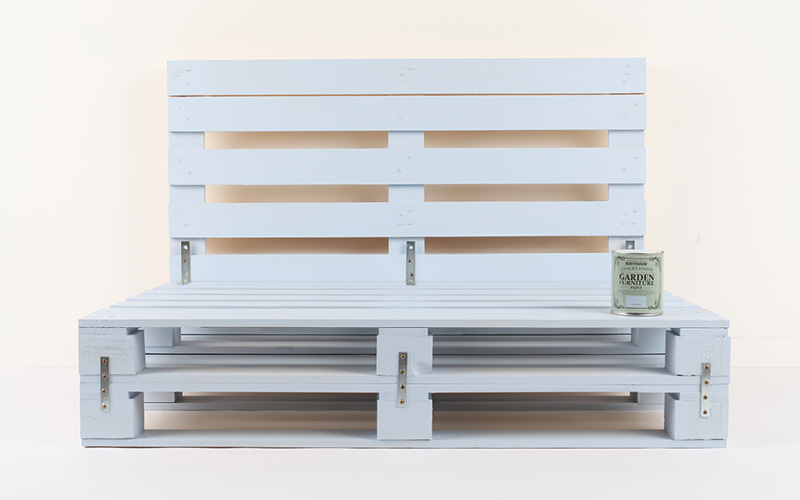
Well, if you like this look I’ve got a fantastic upcycling tutorial here with a little help from my paint favourites Rust-Oleum who I have featured before in other DIY tutorials (I will link my other posts and projects at the bottom of this page). Using Rust-Oleum Chalky Finish Garden Furniture Paint and wooden pallets, you can create something stylish whilst saving a few bob.
Rust-Oleum Chalky Finish Garden Furniture Paint (available in 8 shades) is ultra-durable, bringing a new lease of life and colour to garden furniture. It contains a biocide to protect the paint from fungal degradation and is designed to resist cracking, peeling and blistering for up to 6 years before first maintenance.
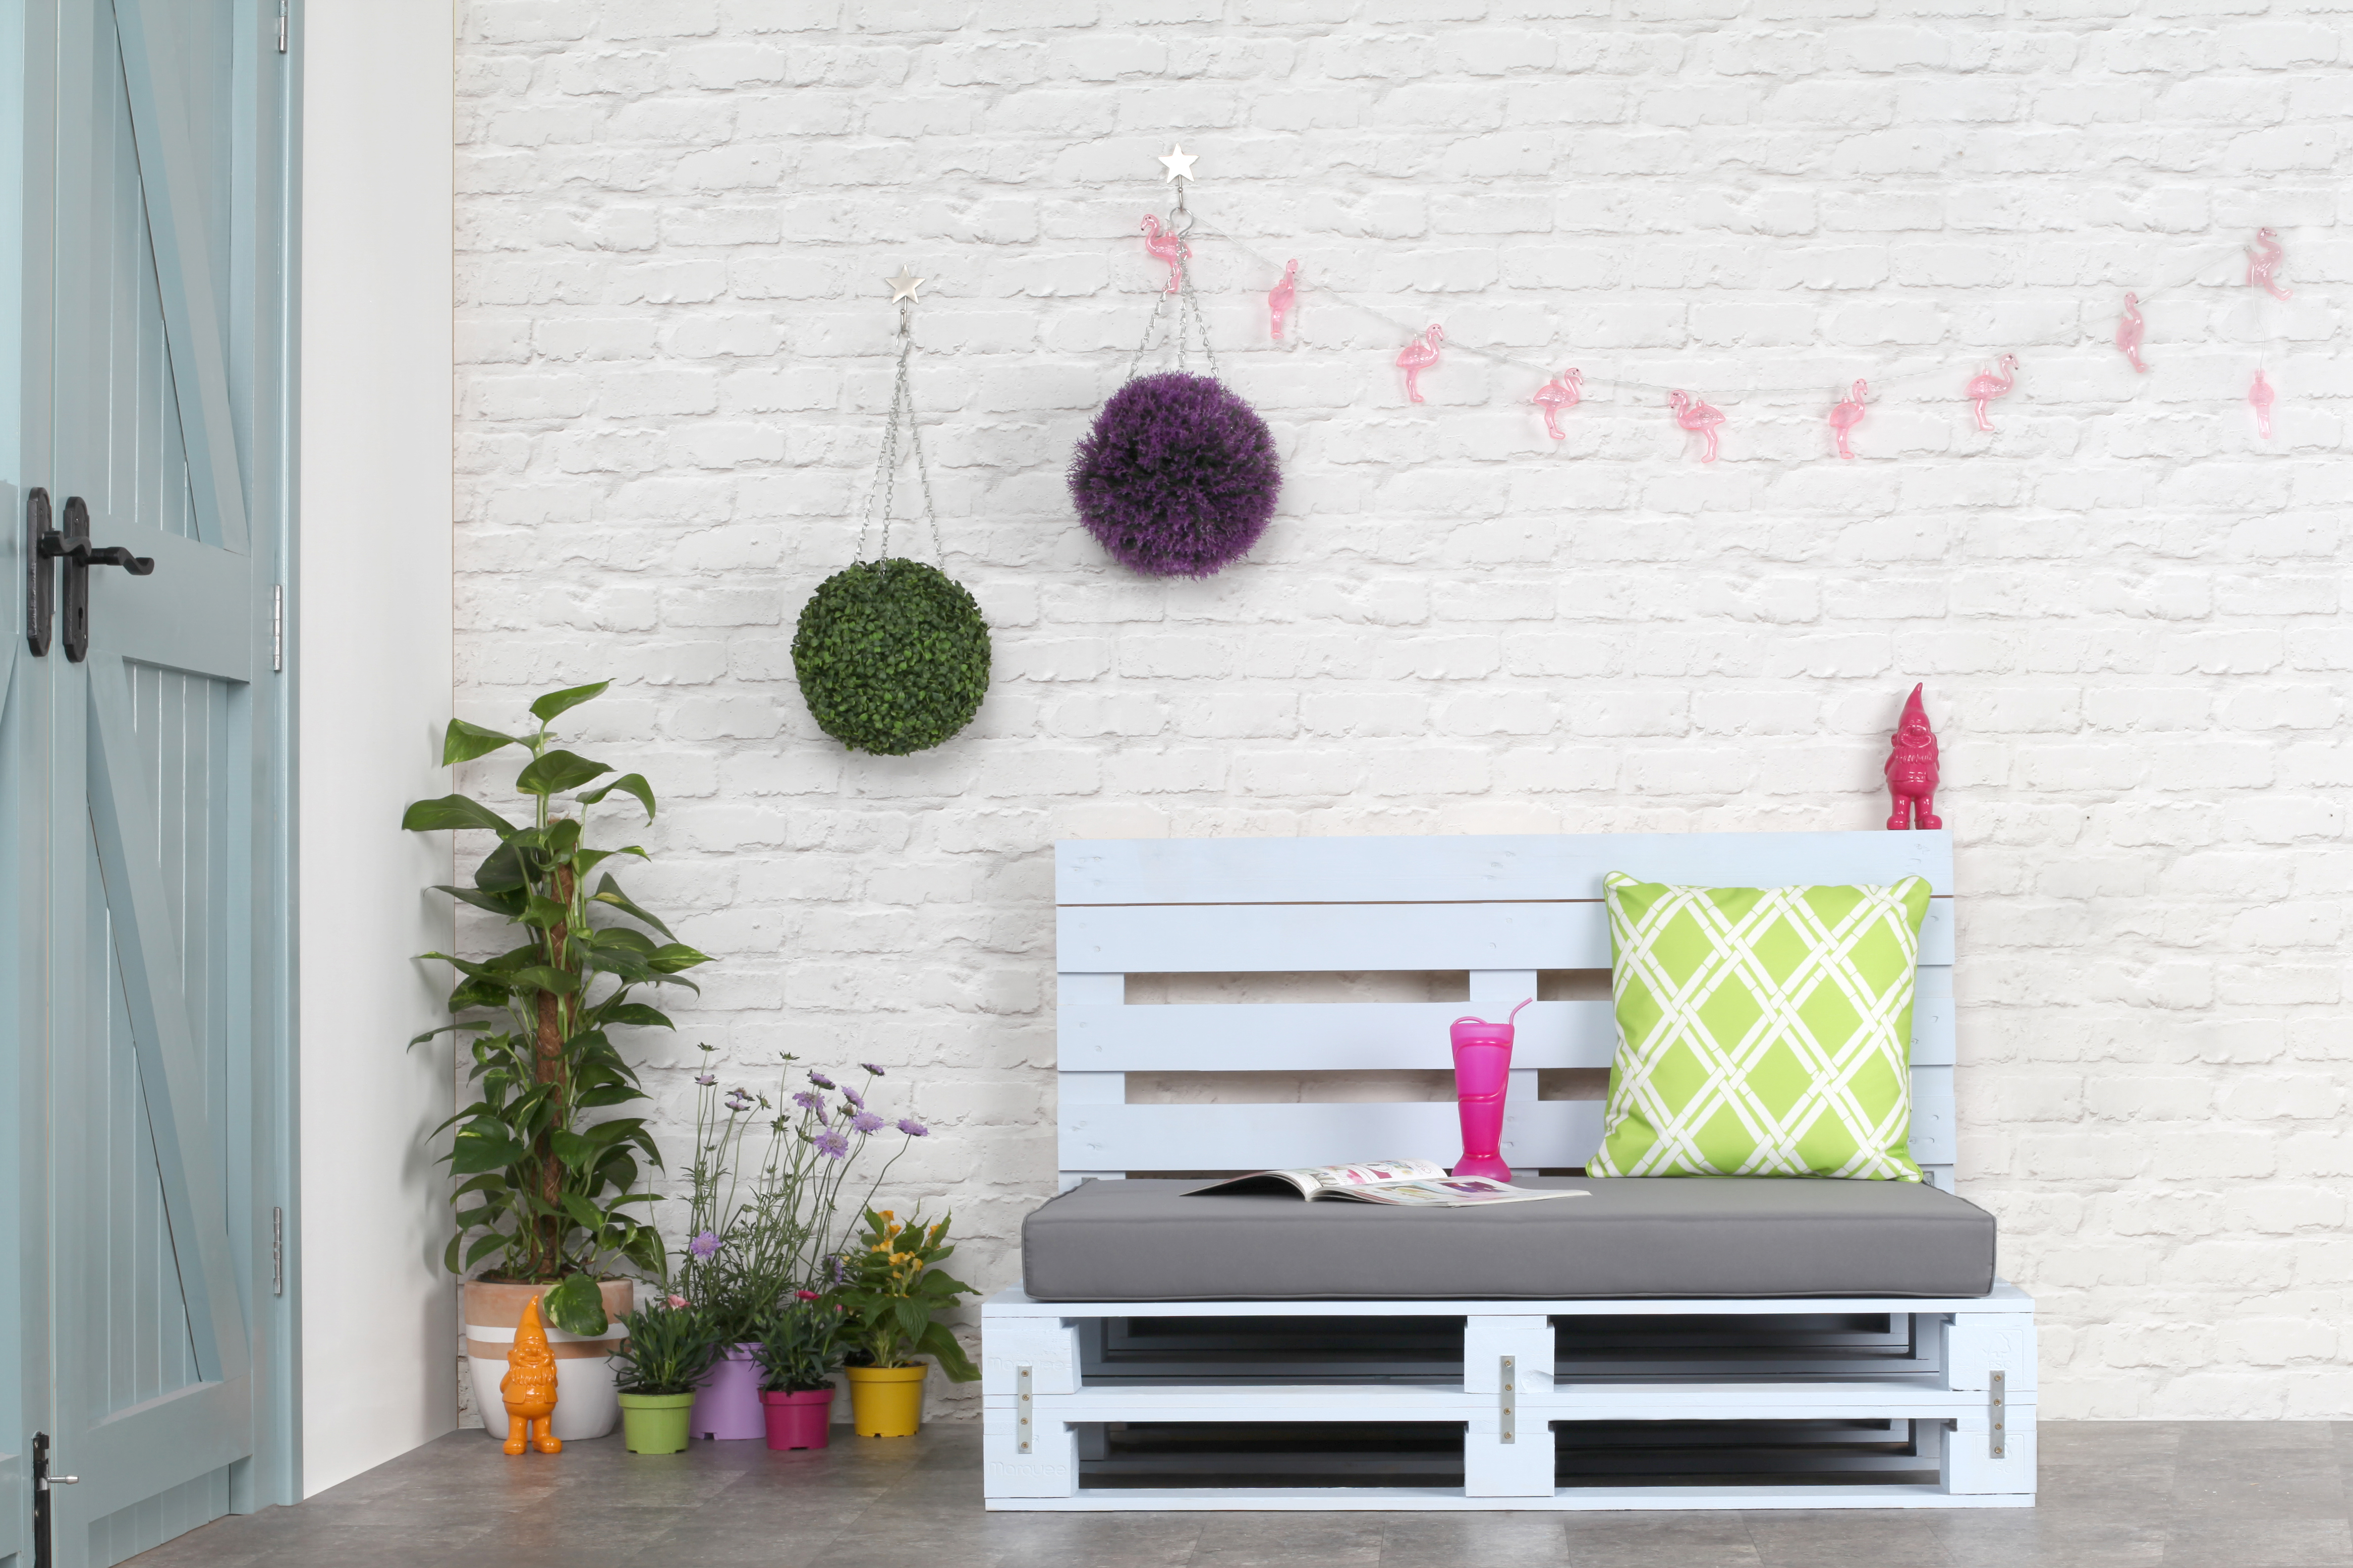
Make sure you get some cushions to compliment your chosen colour too!
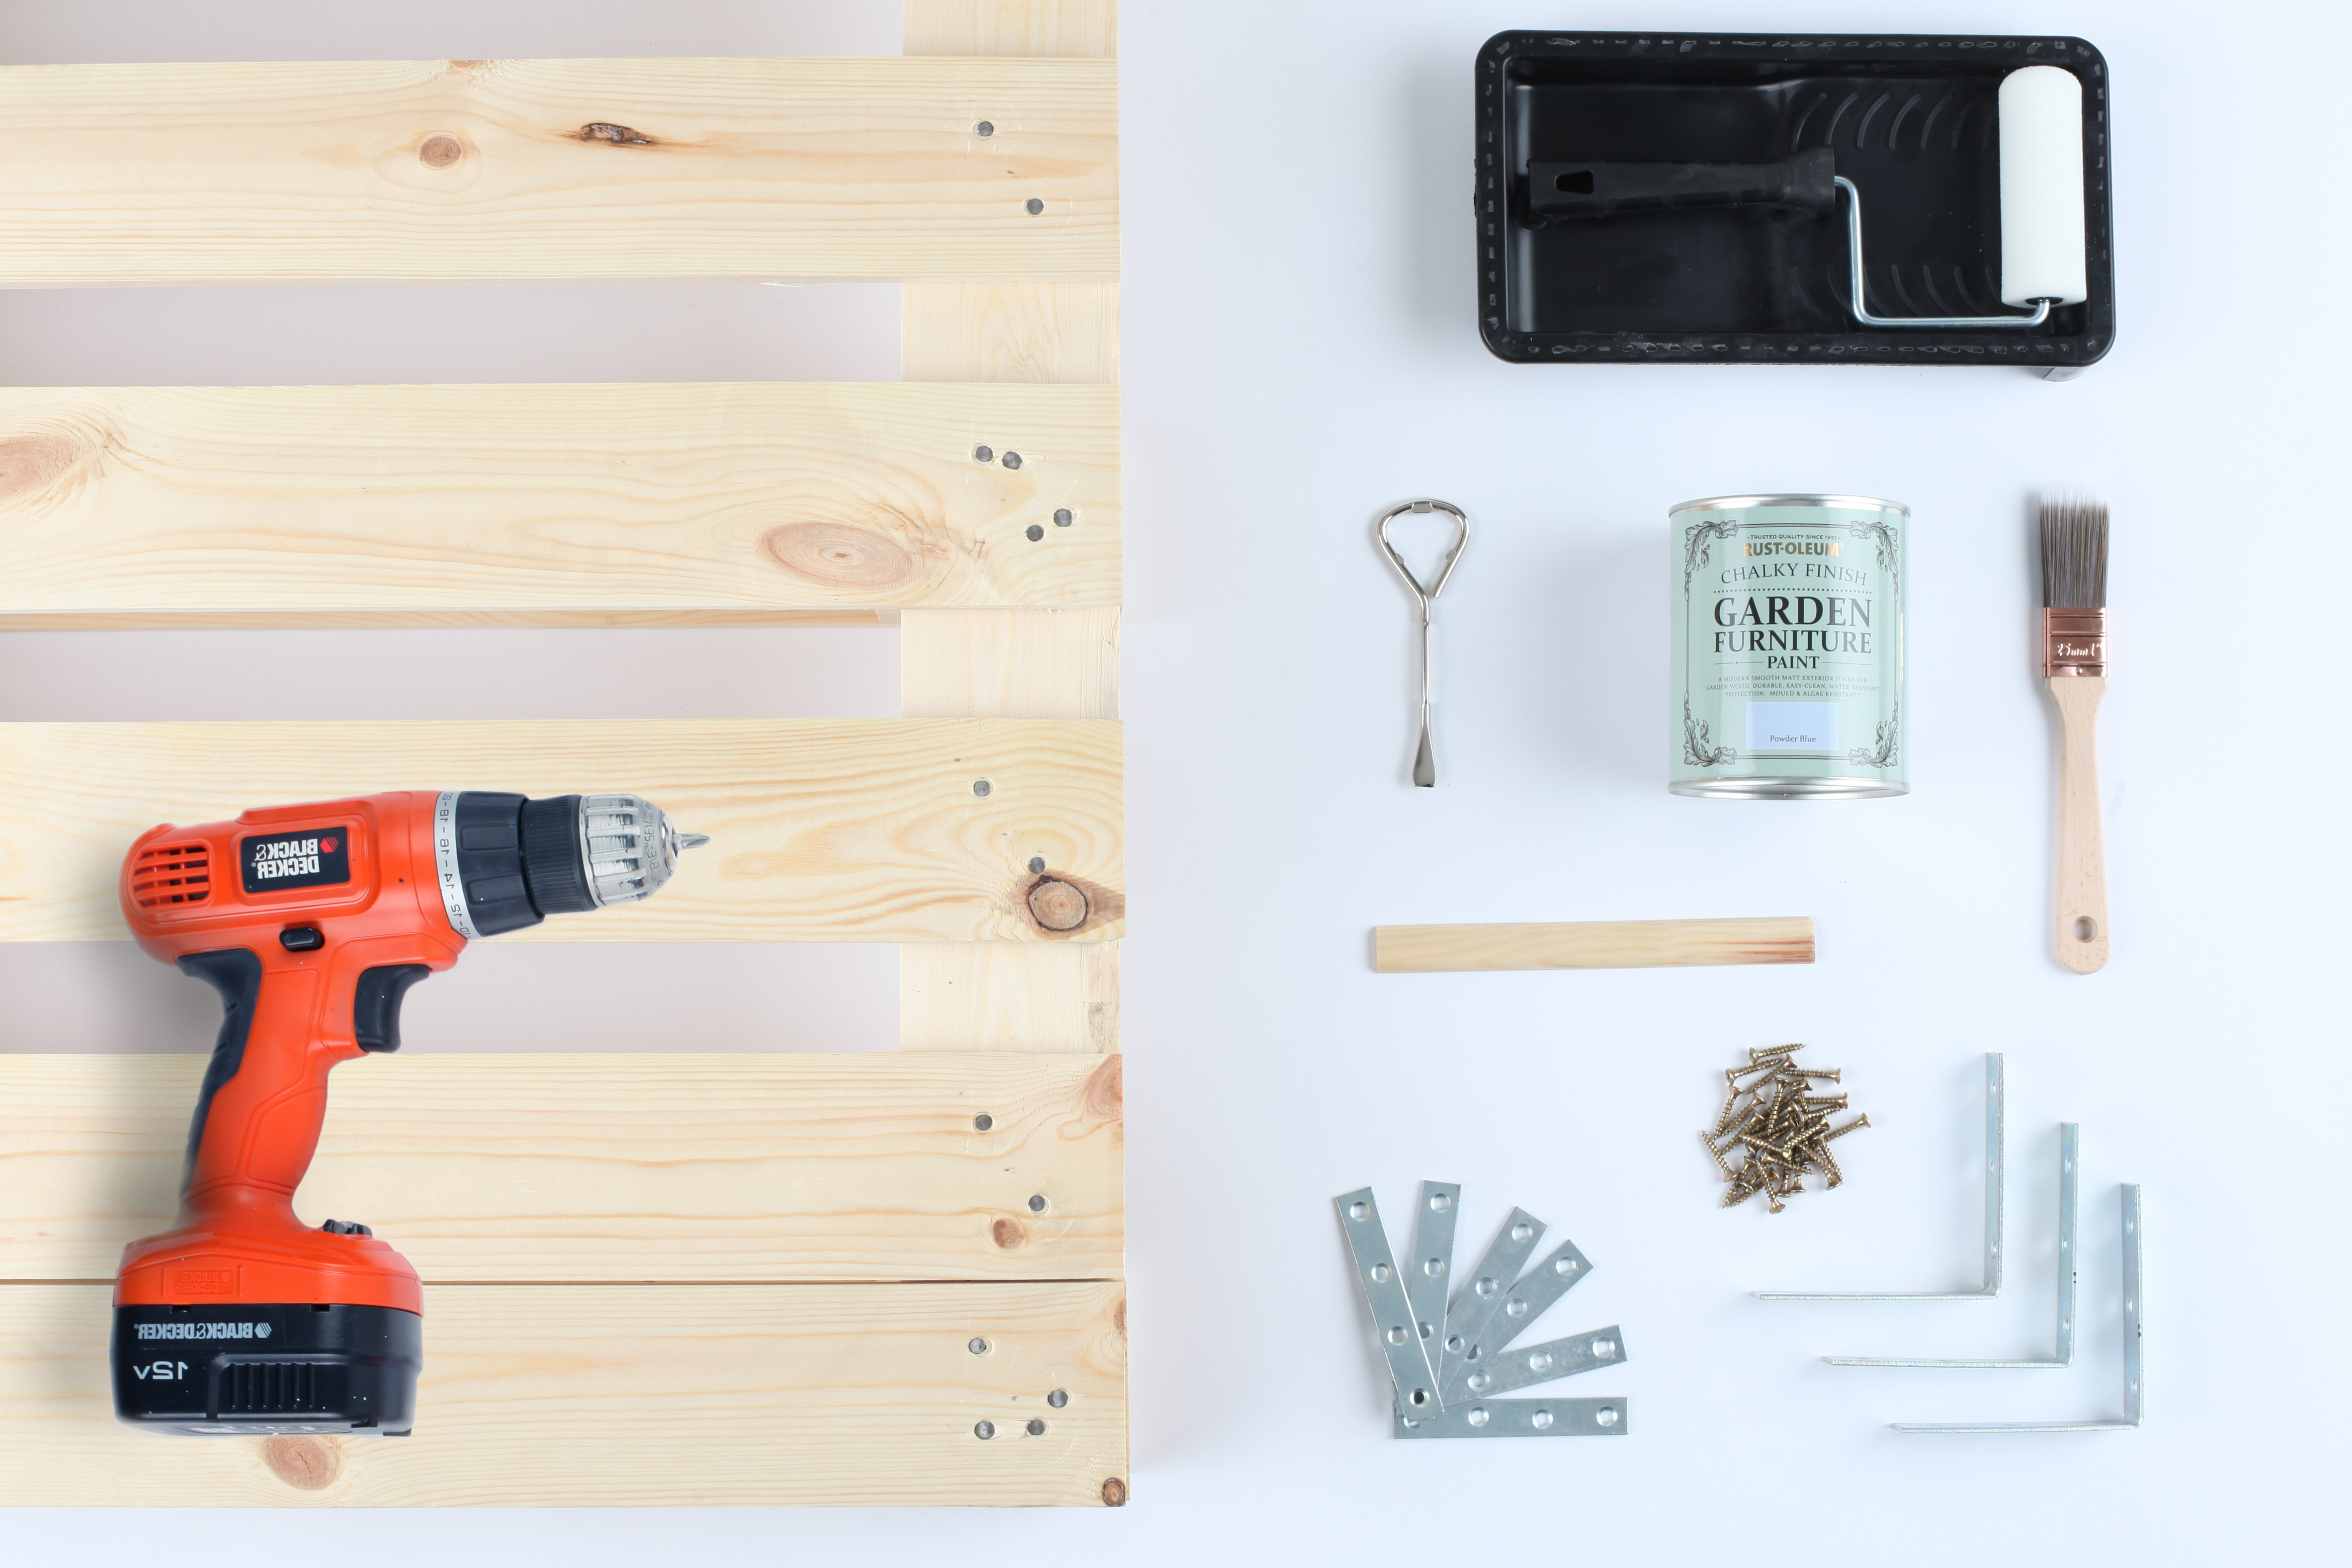
You will need:
- Rust-Oleum Chalky Finish Garden Furniture Paint
- Wooden pallets
- Small roller and tray
- Paint Brush
- Paint stirrer
- Paint tin opener
- Electric drill with screws – we used metal brackets too
Directions:
Step One
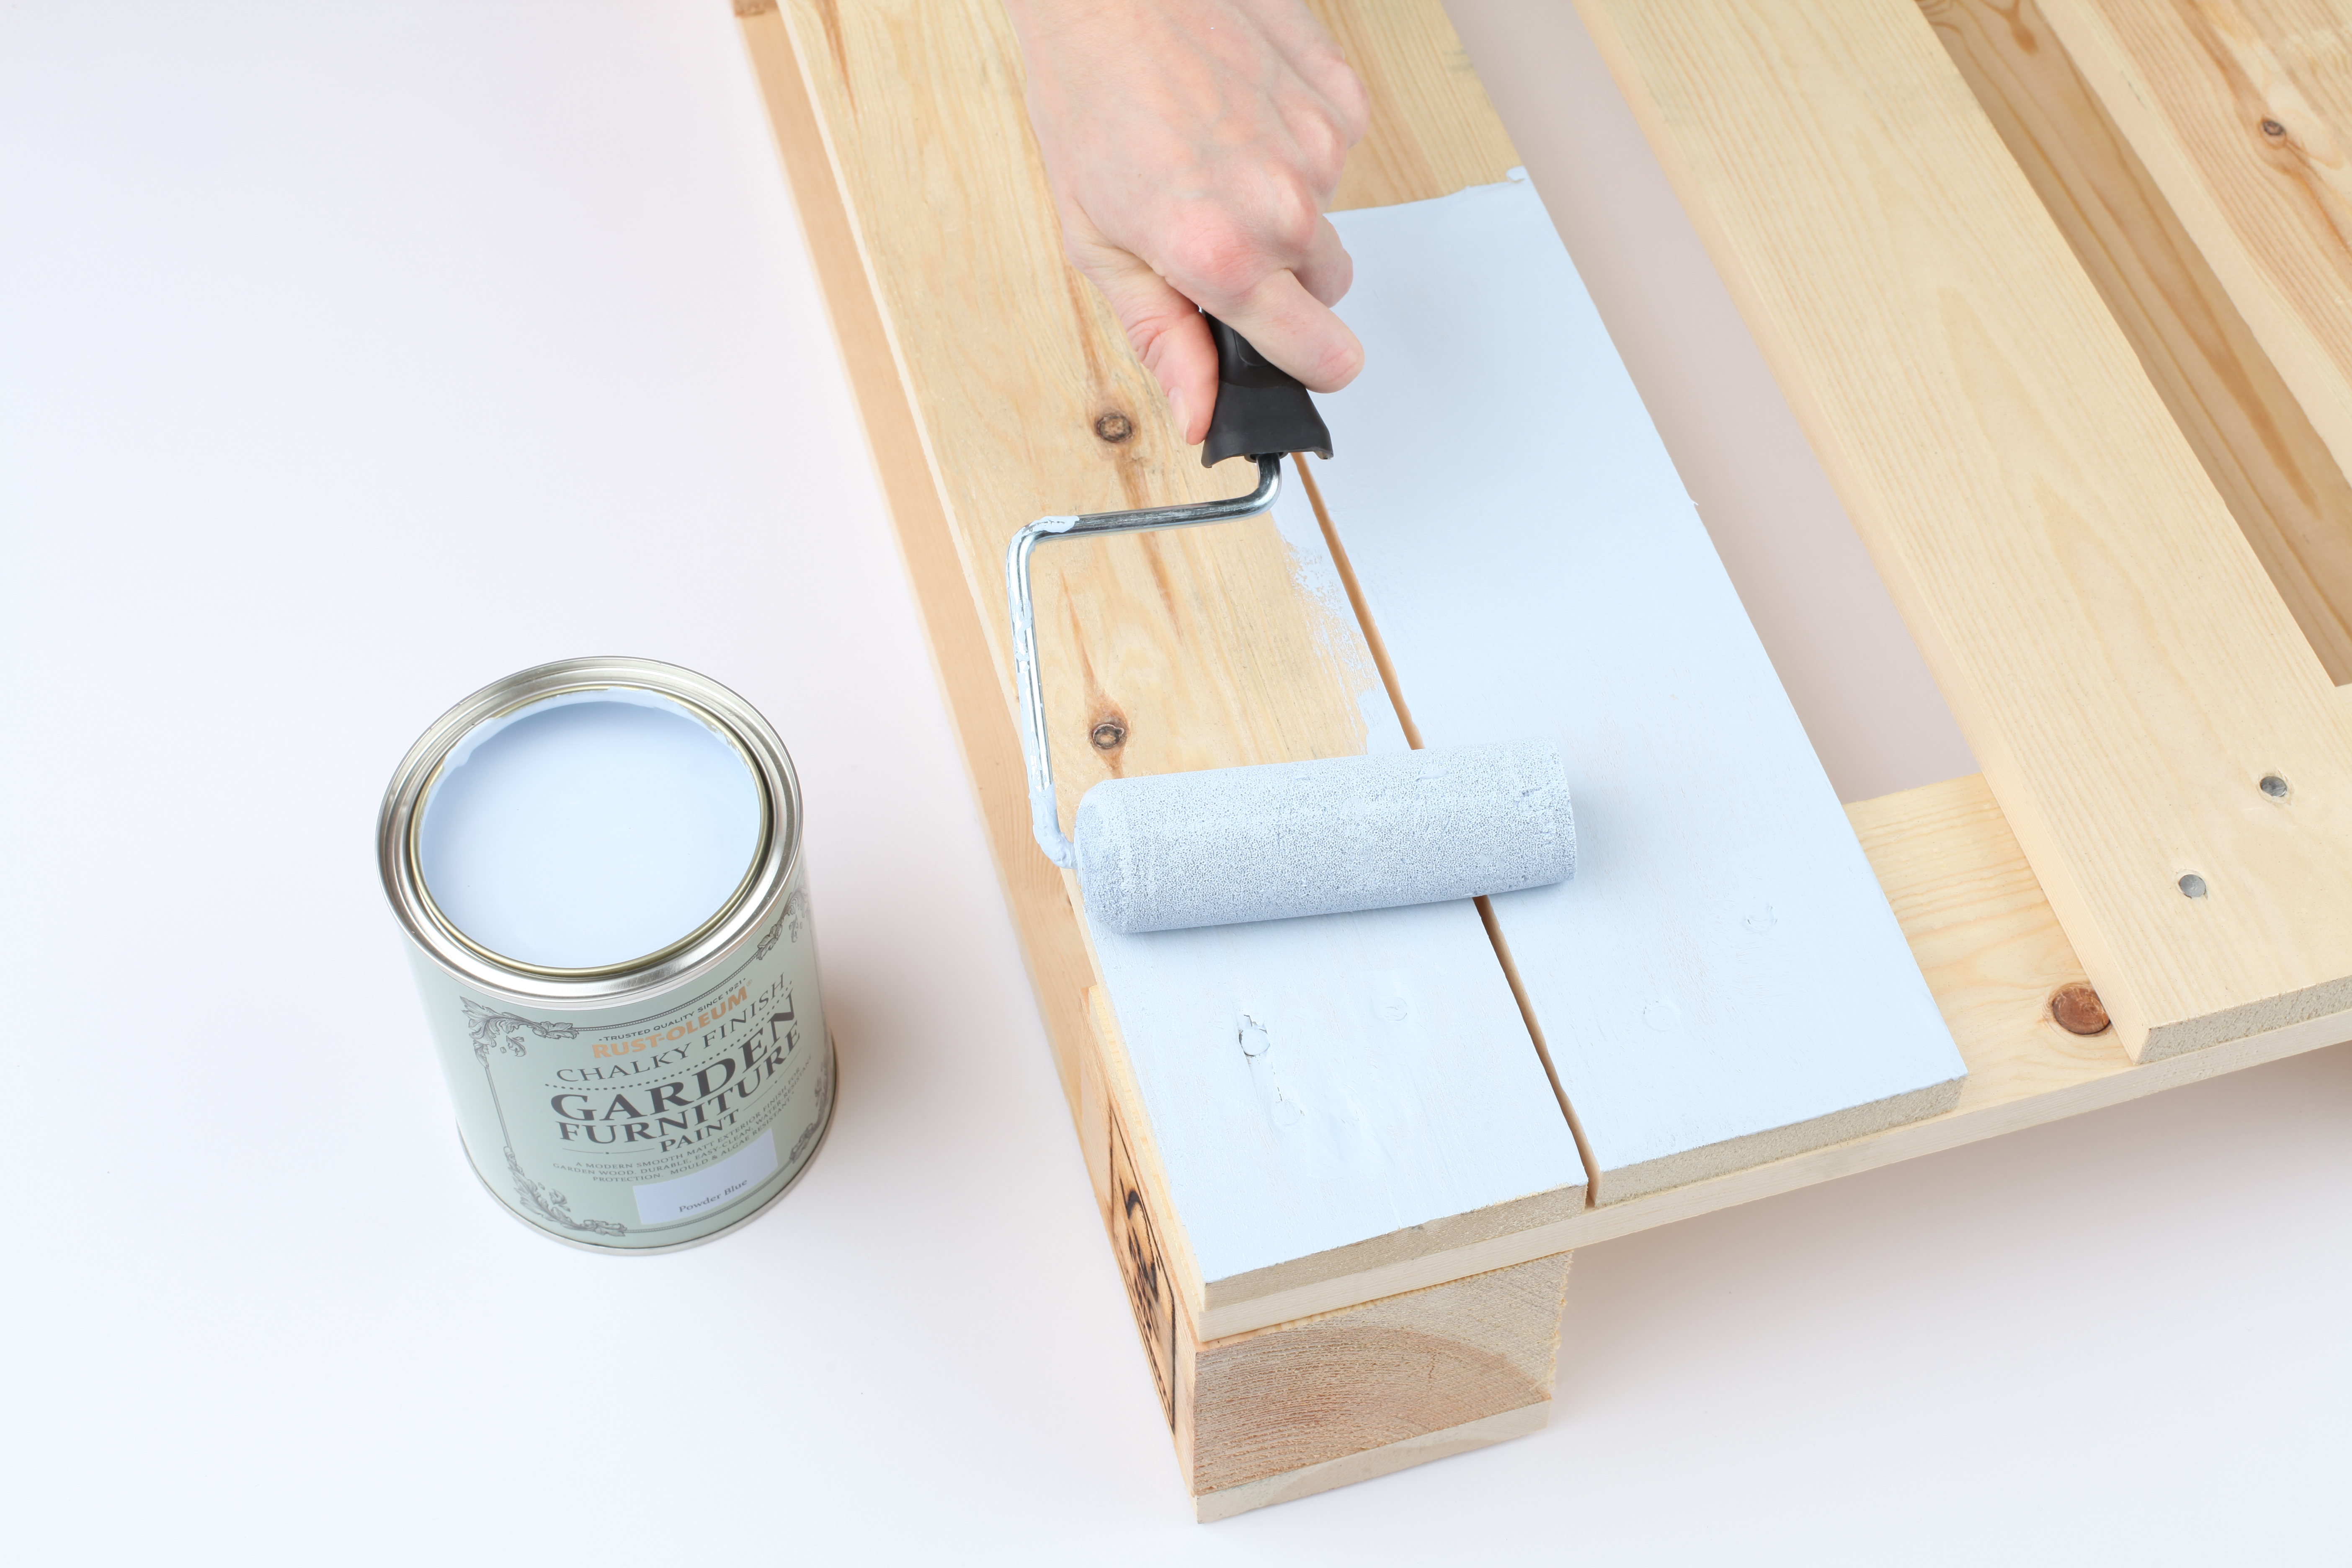
Ensure surfaces are smooth, dry and free from contaminants. Take your chosen shade of Rust-Oleum Chalky Finish Garden Furniture Paint and paint the pallets.
This clever paint requires no priming, is water resistant and is mould and alge resistant too. Use a mini roller for an even finish.
One to two coats will be needed, and you’ll need to leave the paint to dry for one hour before flipping the pallet over and painting the underside. You might need to use a brush for the harder-to-reach areas.
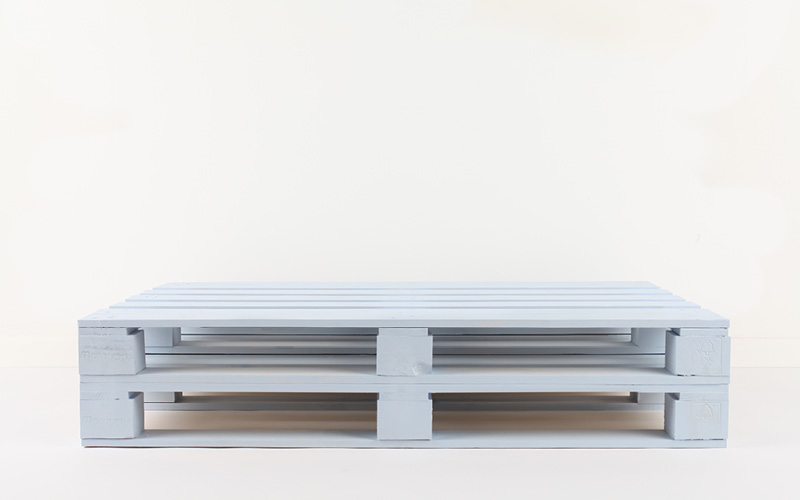
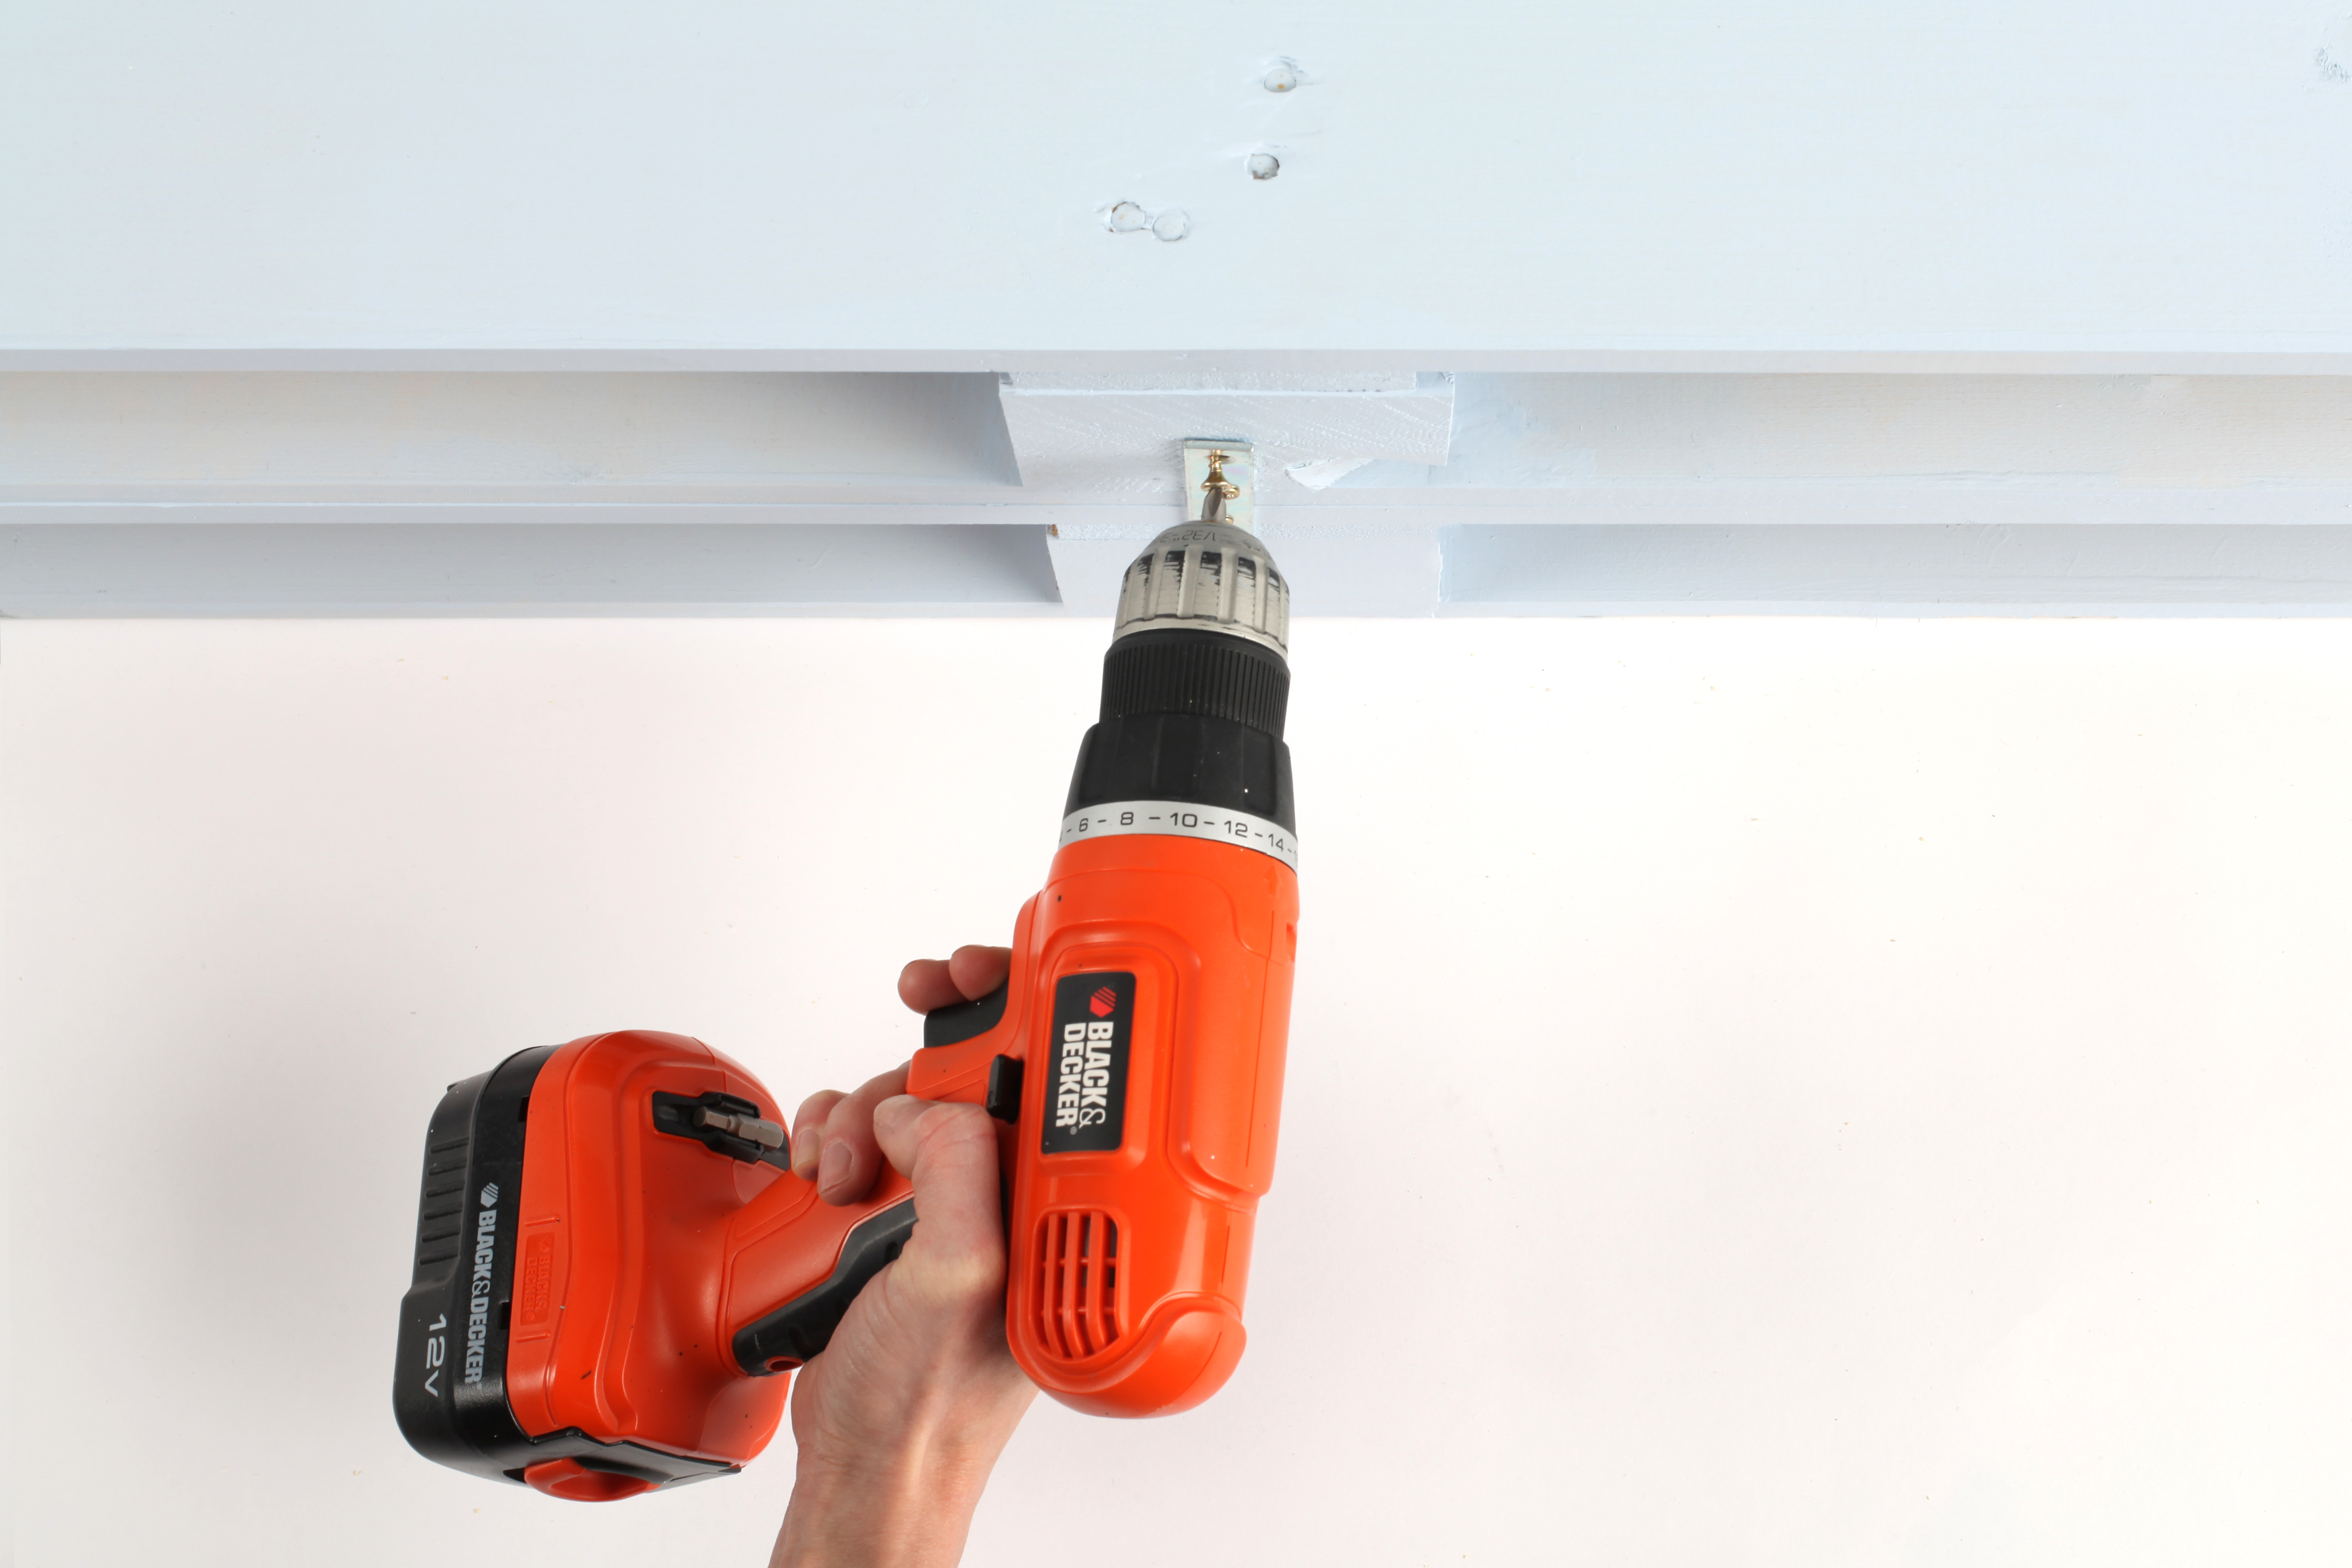
Step Two
Create the base of your bench by stacking one or more pallets to the right height. When you’re happy, secure them with screws and an electric drill.
Add another pallet propped in a vertical position create the back of your chair. Again, secure it in place with a drill and screws.
Step Three
Dress for comfort! I found that Homebase, among other places, sells special pallet furniture cushions that fit perfectly on top of its pallets.
Add colour with more scatter cushions, pot plants and fairy lights.
What do you think of this upcycle? I Would love to hear in the comments below!
See some of my other DIY and creative projects.
